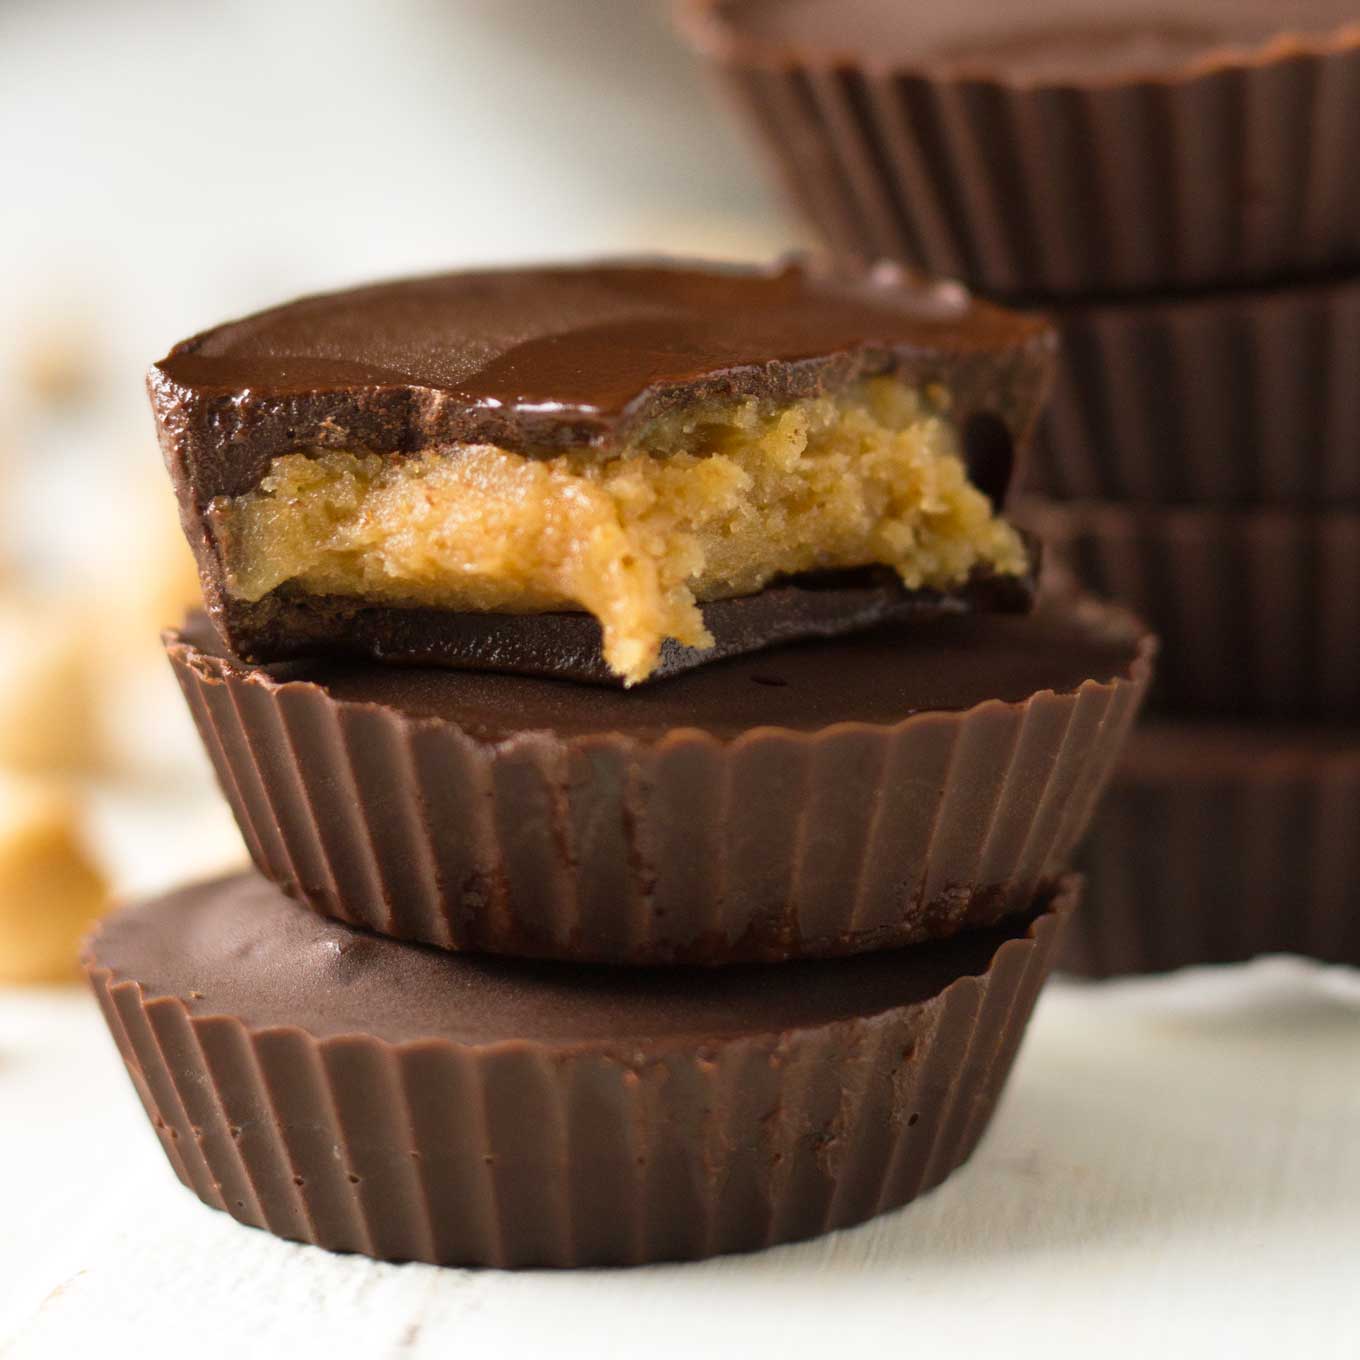
 These are SECRET WEAPON vegan peanut butter cups – so good you would never believe that they contain a stealthy ingredient that takes them to the precipice of being – dare I say it – healthy. What’s the secret weapon, you ask?
Chickpeas! Yes, you read this correctly.
A while ago I made a recipe that was a makeover for Buckeyes, the popular chocolate covered peanut butter ball that typically contains peanut butter, powdered sugar, and butter for the filling. The makeover recipe used maple syrup and peanut butter alone, because by happy accident these two ingredients magically thicken up when blended together. As I was making them, I had the crazy idea to replace half of the peanut butter in the recipe with chickpeas. My brain is weird, but I’m sure glad that it is, because they turned out so great! Like their black bean brownie cousins, you CANNOT tell that chickpeas are present. And there is not a lick of dairy to be found. Hence, Secret Weapon Vegan Peanut Butter Cups (say that five times fast).

These power treats are so easy to put together. I’m going to show you two ways to make them – both the standard peanut butter cup that typically come two in a package, and also a mini peanut butter cup version. A big mouth option and a little mouth option. So let’s get crackin’.
Ok, so first, we need to melt the chocolate chips and coconut oil in a small saucepan over low heat. Or use the microwave in 30-second increments. Or use a double boiler. You have options when it comes to melting chocolate. I’m just telling you what I did, ok? Calm down.

Pour one teaspoon of melted chocolate into each liner, swirling it around to let it come up the sides just a bit, and then stash them in the freezer to chillax while you make the filling. Are you getting hungry yet?
This is the part where you might think I’m a little bit crazy, especially when it comes to chickpeas. For garbanzo’s sake, I wrote a whole post about how to cook them. But once you’ve tasted these, I swear you won’t be questioning my sanity anymore. You’re just going to have to trust me on this. So let’s make the filling.
In a food processor, pulse the chickpeas until they are crumbly, but not pureed, with no big pieces of chickpea visible. We’re not making hummus here, folks.

Add the peanut butter, maple syrup, and salt, if using.
Pulse the food processor until the mixture seizes up into a ball. It’s really obvious when this happens, and the food processor will probably struggle a little bit to let you know that the magic has happened. As in, it might cry “Uncle!” because the mixture is too thick. And that’s when you know it’s done. By the way, if your food processor actually does cry out, you might need a new one.

Update: In the original version of this recipe, I called for chickpea flour to be added to the filling at this point. After some testing (YUM), I discovered that it wasn’t necessary at all. So if you are a long-time reader and are wondering what the heck happened to the chickpea flour, now you know. 🙂
Now measure out 2 teaspoons of filling and roll into a ball. You can also pat it down into a flat circle, but I like to wait to do that until I press it down into the muffin liner. It’s easier to make sure it’s the right size. Repeat with the remaining filling until it’s all used up – you should get at least 12 balls of filling.

Pull out the muffin liners from the freezer, then place one ball of filling into each cavity. I just realized that I’m unintentionally using a lot of dental jargon. Not sure what to make of that. Anyway, now press the ball down into a disc shape, leaving a very small amount of space between the filling and the sides, to make room for the chocolate to settle in.

For the final touch, pour 1 teaspoon of melted chocolate into each liner, taking care that the chocolate gets down into all the nooks and crannies on the sides. Nobody likes a bald spot on their peanut butter cups.

Things are getting really serious now. Just look at those beautiful babies.
Back into the freezer they go, and so begins the longest 15 minutes of your life while you wait for them to set up. If you are super-duper patient, wait 1 hour. And then, my friends, unwrap, and savor the secret weapon goodness.
But Beth, how do I make mini peanut butter cups? I’m glad you asked.
To make mini peanut butter cups, you just use mini muffin liners instead of regular muffin liners. What, were you expecting something more complicated? Ok, ok, here’s another, let’s say, fancier, option. A couple of birthdays ago I was gifted this silicone mold, and it was like the universe was saying, “Beth. It is time to make mini peanut butter cups.” As if I needed convincing. Anyway, you can totally use it to make awesomely perfect looking mini peanut butter cups. Plus you feel a bit like Willy Wonka making candy in a fancy pants candy mold. (RIP, Gene Wilder.)
Whether you go fancy or not, the process is the same. Pour 1/2 teaspoon of melted chocolate into the bottom of each cavity, and spread it all up the sides. Freeze it while you make the filling. Then measure out 1 teaspoon of filling and roll it into a ball, repeating until all the filling is used up. Place each ball of filling into the chocolate-coated cavities (ha ha), and then pour 1 teaspoon of melted chocolate down over the top, gently spreading the chocolate so it settles down into all the nooks and crannies. Freeze for 15 minutes minimum or up to 1 hour, then unwrap or un-mold, and enjoy!

I cannot be blamed for the involuntary yummy noises that you make when eating these. I’m just saying that you may want some privacy. You’re welcome.
P.S. Michael wanted to name these “Chick-Choc Peanut Butter Cups”, as in “tick-tock”, or “there’s always time for Chick-Choc Peanut Butter Cups!” I give him props for cleverness, but we had creative differences and I went another direction. I hope he can forgive me while he eats one of these.

Secret Weapon Vegan Peanut Butter Cups
Ingredients
- 1/2 cup cooked chickpeas (rinsed and drained well)
- 1/2 cup natural peanut butter
- 3 Tablespoons maple syrup
- pinch of salt (omit if using salted peanut butter)
- 1 1/2 cups dairy-free chocolate chips (the Enjoy Life brand is a good choice)
- 1 Tablespoon coconut oil
Instructions
For standard peanut butter cups
- Melt chocolate chips and coconut oil either on the stovetop or in the microwave until pourable.
- Add 1 teaspoon of the melted chocolate mixture into the bottom of a muffin cup (silicone is deal, but the standard paper muffin liner will work too). Swirl the chocolate around so it covers the bottom and swirls up the sides of the muffin cup slightly. Place in the freezer to set up while you prepare the filling.
- Pulse chickpeas in food processor until crumbly, but not pureed.
- Add the peanut butter, maple syrup, and salt (if using), and pulse until the mixture "seizes up", or suddenly thickens. This happens quickly and is very obvious.
- Measure out 2 teaspoons of filling and roll into a ball. Set aside on a piece of parchment paper or a plate. Repeat with the remaining filling - there should be enough for at least 12 balls.
- Remove muffin cups from the freezer. Place one ball of filling into each cup and pat down into a flat circle, leaving a small amount of space between the edge of the filling and the muffin cup.
- Pour 1 teaspoon of melted chocolate mixture over the top of the filling and jiggle slightly to let the chocolate settle down over the filling.
- Place the muffin cups back into the freezer to firm up for at least 15 minutes, or until completely set (1 hour). Once set, unwrap, and enjoy! Makes 12 peanut butter cups, or 24 mini peanut butter cups
- Store peanut butter cups in the fridge or freezer until time to eat. They won't take up space for long.
For mini peanut butter cups
- Use mini muffin paper liners or this silicone candy mold.
- Pour 1/2 teaspoon of melted chocolate into each cavity, and spread it across the bottom and up the sides. Place in freezer to set.
- Measure out 1 teaspoon of filling and roll into a ball. Repeat until the filling is gone (should yield about 24 balls).
- Remove muffin cups or candy mold from the freezer.
- Place one ball in each cavity and cover with 1 teaspoon of melted chocolate, spreading gently to allow the chocolate to settle around the filling.
- Place muffin cups or candy mold back into the freezer and let set for at least 15 minutes before enjoying. They will be fully set/hard after 1 hour.

Looks absolutely fabulous, great post!
Thanks, Me! I know who you are! 🙂
Girl, these look AWESOME. Never tried a chickpea PB cup but I will now!
Woo hoo! Please let me know if you do! Tag me on IG at #eatwithinyourmeans, perhaps? 🙂
*Faints* I am so glad I was on hand to experience the absolute ADDICTION of these little babies!! Seriously, people, I am not vegan (although I like a lot of vegan food), but these peanut butter cups are magical…in more ways than one (like, they somehow disappear from the freezer at a shockingly rapid rate)! Reese’s don’t even compare. At all. The temptation of these cups is so great, even a peanut butter sensitivity could not hold me back. I’m pretty certain you need these in your life. They are worth the wait!
Hannah, your hard work is now memorialized! I’m so glad I had your help along with the other members of the Opal team for this post. We miss you already! Come back soon and we’ll make more yummy treats. 🙂
It was kind of weird to see the step-by-step pictures, because most of the time, you were so fast snapping those pictures I didn’t even notice!! We all had so much fun making test recipes with you!! I hope we get to do it again!! And we didn’t get a chance to make that dip either…what do you think? I think that requires a return visit! 😛 We miss you all too!!!
I’ve seen chickpeas sneaked into just about everything, but peanut butter cups is a first (and a must-try!) Entertainingly written post, too. The food processor crying “Uncle!” cracked me up xp
Thanks for the kind words, they made my day. 🙂 It’s nice to know my sense of humor is appreciated. Please let me know if you try them! Chickpeas in everything!
We made these tonight and they are fantastic! For those without a mold and/or mini muffin tin, I did everything on a baking sheet. I used a tablespoon to shape the filling and put the little mounds on a parchment covered baking sheet (foil would work too). I did the chocolate in the microwave then transferred it to a zip lock bag and cut the corner off, like a make shift pastry bag. Transferred the filling to a plate. Used the chocolate baggie and made little chocolate circles on the baking sheet. Put the filling on top of those then drizzled chocolate over, some even covered. Put the baking sheet back into the freezer till everything is set and viola! Not quite cup shape, but still fantastic. Thanks for the recipe!
I was told there are no dumb questions, so… hopefully you agree 😀 This looks like the coolest recipe! I am just mad curious about one thing – since I started vegan eatin’, I have loved chickpeas, and I’m so curious – what do they do for the recipe? More fiber, maybe some protein? The slightly more serious part of my question is that I have a Dad who I love very much, he has survived a heart attack, and getting him to eat well is like … well, I imagine my Gran had a similar experience in the early 1940s 😀 I plan to hide as much good stuff in what he eats as possible.
So yeah, chickpeas in “Ree-sees” (that was rhyim’ in my head) sounds awesome! Any nutritional stuff to add? Thank you, I used to think I was a good cook & a good photographer but I stopped since all the Food Bloggers are so darn good at it! 😀
You will need something to bind the maple syrup and peanut butter otherwise when you bite, you will have a gooey mess. Instead of sugar, gelatin, thickeners, etc., the chickpeas act as a neutral binder so the flavour of peanut butter reigns. As for nutrition….protein and fibre instead of the empty calories of powdered sugar.
oh my goodness,
I have never connected wiht many 0 but i know you are a beautiful soul
from a fellow vego I have vegan days but and your expression is what i want to be…
please help me learn your beauty
loads love tara
ps i dont know if you will reply personally
Hi Tara! I’m so glad you left a comment. Thanks for the kind words! 🙂 ~ Beth
They look delicious, but I’m curious about using chickpea flour without cooking it, since it usually tastes horrible until it’s cooked! Can you really not taste it in these?
Hi Rebecca! I can’t taste the chickpea flour in these, and they’ve been enjoyed by several others who haven’t mentioned the flavor, BUT I just recently made them again without the flour as an experiment, and found that it was completely unnecessary. I’m planning a version 2.0 of this recipe soon (with an easier assembly method as well), but in the meantime I think I’ll update the recipe to leave out the chickpea flour. Hope you give them a try – they just got great reviews at a party today. 🙂
These were SOOOOOOOOO good and so easy to make! The best part is your blog makes me laugh, love the way you write. My meat eating friends were shocked and yeeeeee for the TV show!!!!
Well, you have just made my day. No, my week. Oh, I don’t know how much time, you just made me very happy. 🙂 Thank you so much for making these and letting me know how it went! So fun to shock the omnivores, huh? 🙂
One more thing, where did you get the measurement scoop that you used on TV?
Oh, thanks for the reminder! I need to update the post with the link. In the meantime, here it is. 🙂
WOAH. These look amazing!! I love the addition of chickpeas. And I’m game for anything with chocolate and peanut butter. Also, I love your writing style and sense of humor. =)
OK, take two! The taste was delicious the first time, but I didn’t quite get the appearance down. This time, I did add some chickpea flour and it really helped with the consistency. So, if you are like me, making your unsoaked dry chickpeas in the instant pot just beforehand, you might want to sprinkle a bit of chickpea flour in before you blend the maple syrup-peanut butter-chickpea mixture. This time, I was still skimpy with the chocolate on the bottom (I’ll get better!), but it meant I had A LOT of chocolate to go on top. I think that we are about to have a very wonderful back to school treat! And yes, we are both adults…
Is it possible to make these without the oil? I’m wfpb no oil but miss these treats!
Hi Samantha! Yes, it definitely is. The chocolate may be slightly more difficult to spread into a thin layer, but it should work just fine. 🙂